Barcode scanning New 07-26-2021
Overview
It explains about barcode scanning using external scanner devices and camera here.
User can scan various symbologies using those devices.
Concerning how to scan using the barcode image files or clipboard, see "Basic Operation > Barcode Detection".
Basic Operation
It explains about basic operation which scanner devices and camera.
1. Start and Stop
How to start and stop to scan will be as follow:
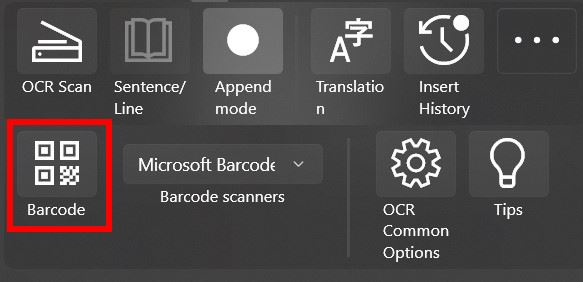
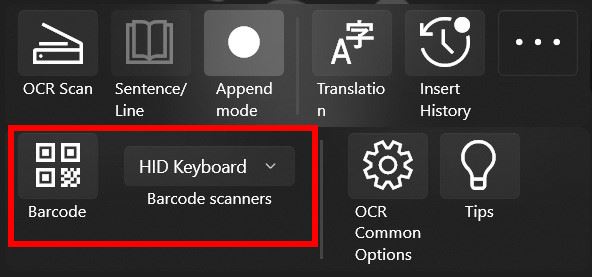
- Start: Click on "Barcode Button".
- Stop: Click on "Barcode Button" again.
- Shortcut-key: Start and Stop are a "B" key.
Note: All of the shortcut-keys will be not worked, when select "HID Keyboard".
2. Scanner Devices
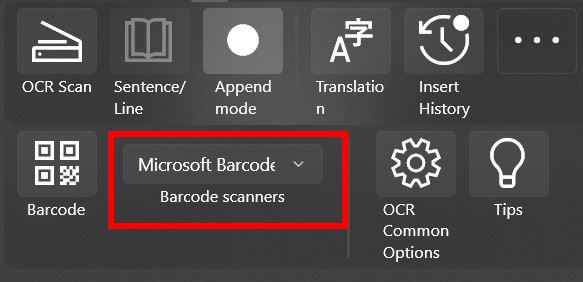
Select a scanner device.
There are all of the detected scanner devices in this list.
3. History List
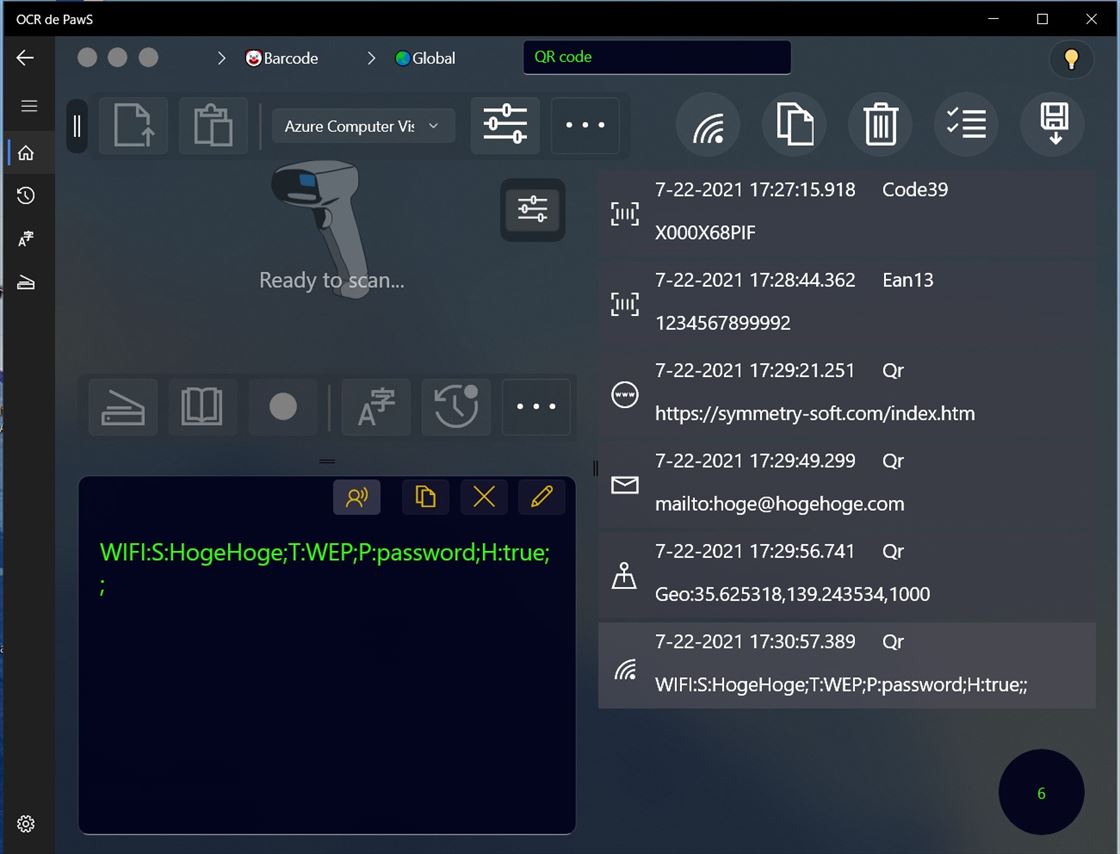
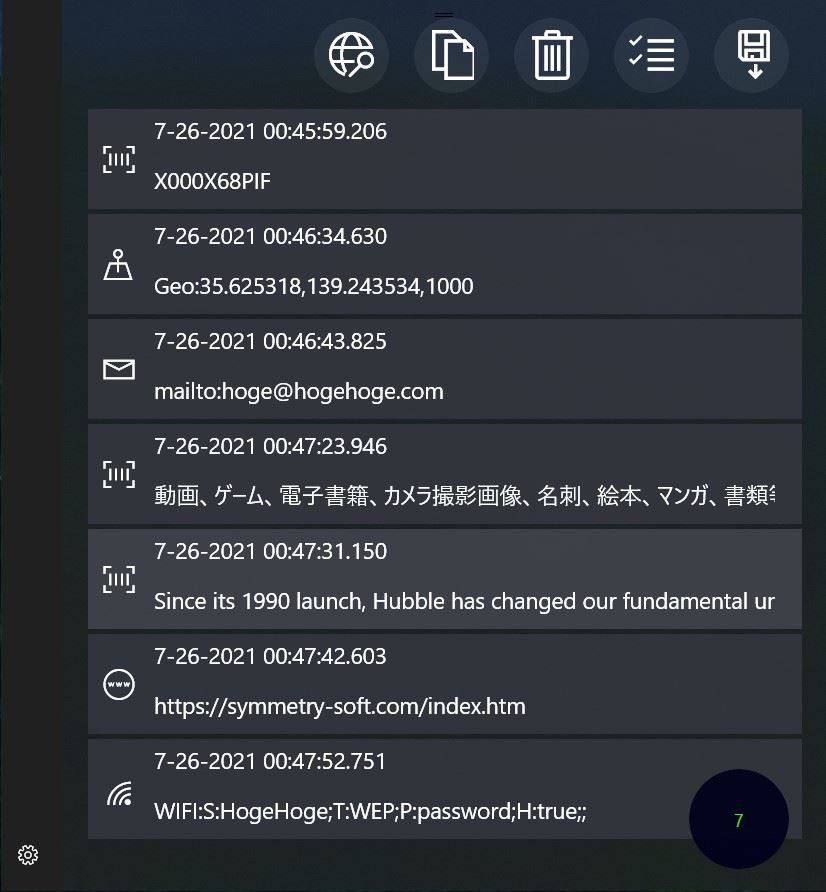
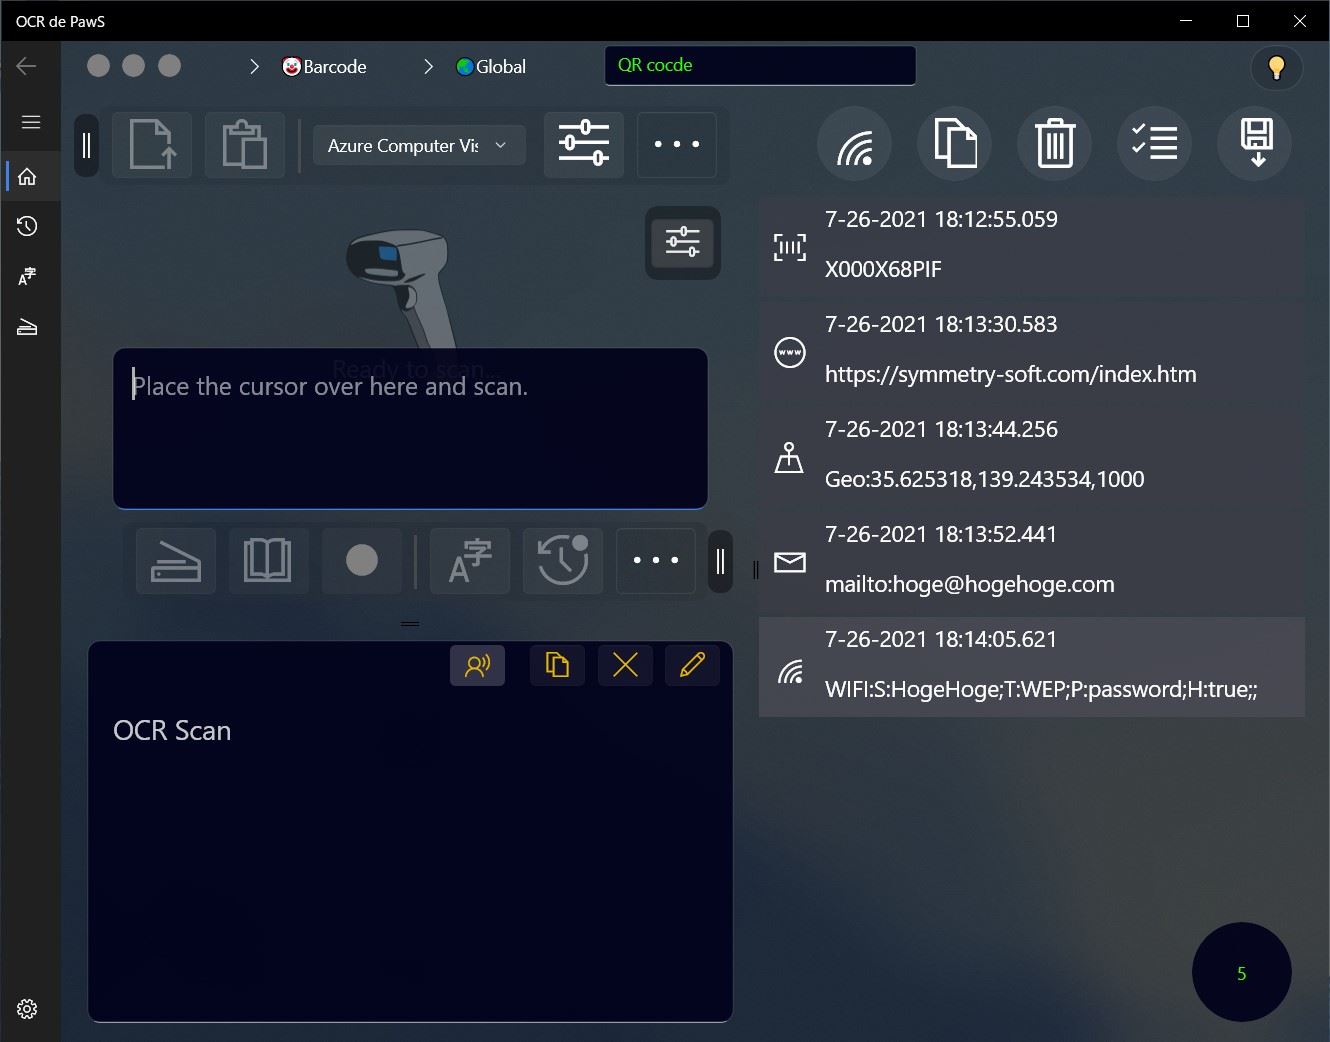
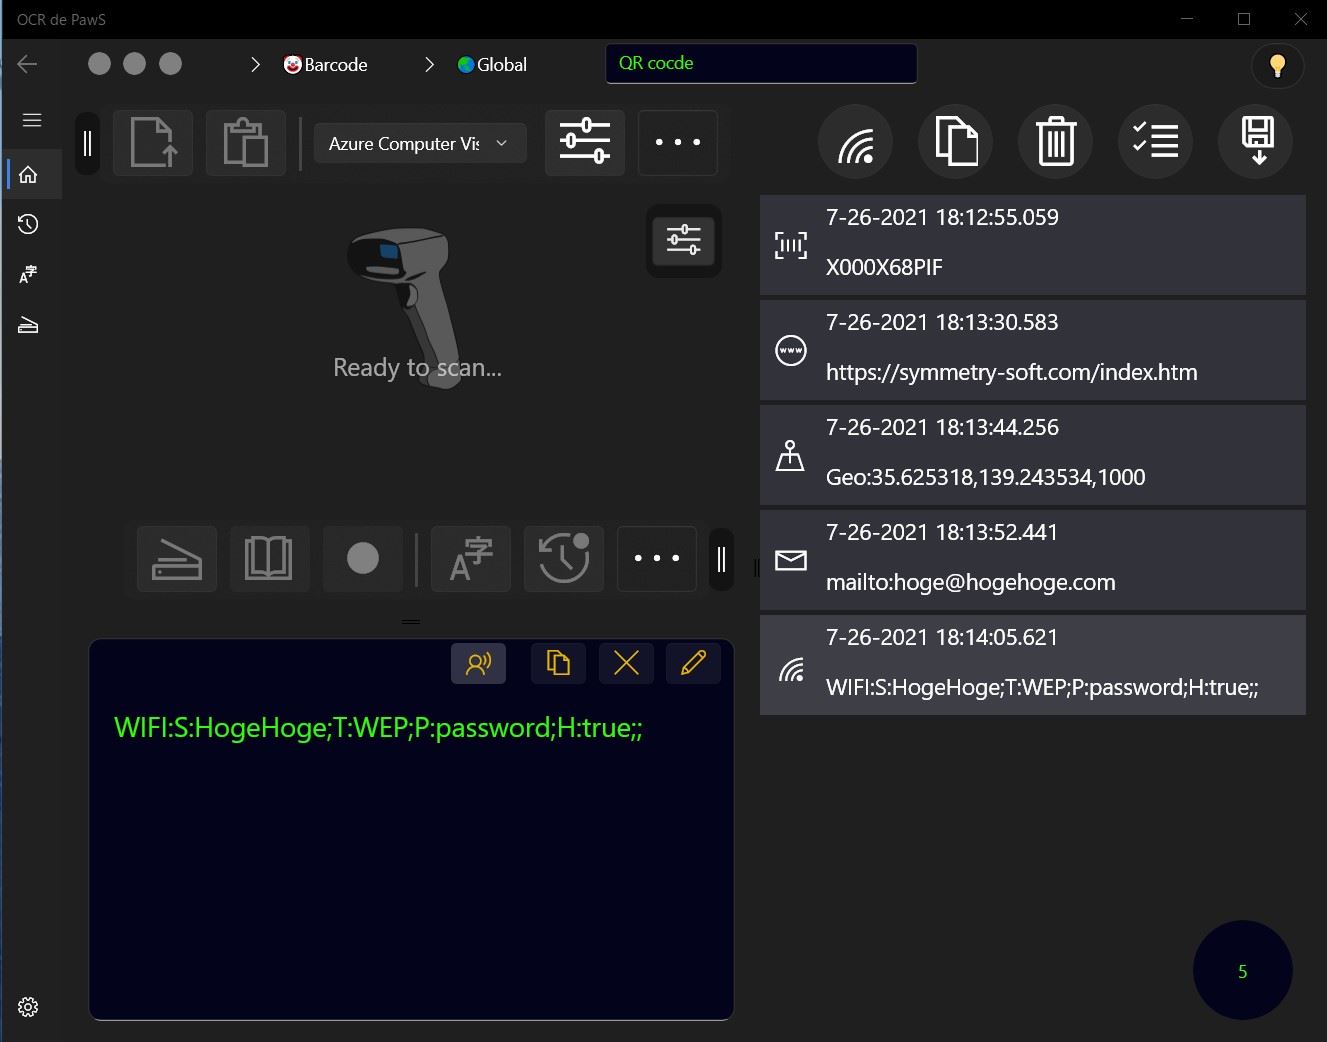
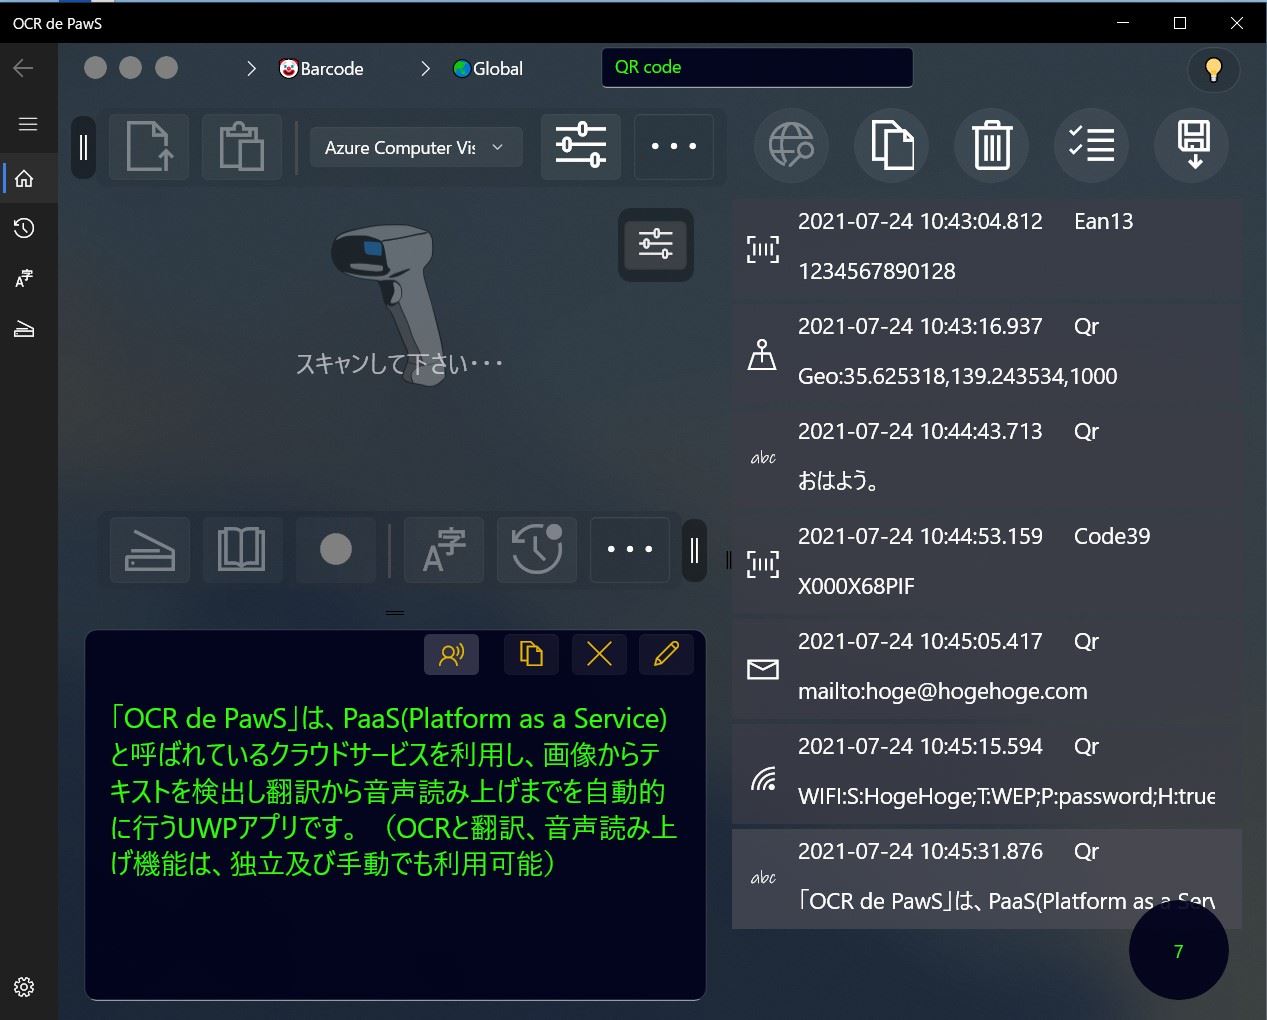
When a scanning succeeds, the data item will be added in the list.
If a same data item already exist, shows a message and doesn't add.
All of the history items will be deleted when this app exits.
User needs to save using export function, if doesn't want to delete.
When user select a item, its data is shown in the left text box.
A list item has detail information as follow:
- Timestamp: Scanned date and time. (mm-dd-yyyy hh:mm:ss.000)
- Data category: Category icon.
- Symbology type: Symbology name. (It's hidden when select HID keyboard or Serial connection.)
- Label: Scanned data.
4.History Commands
The Commands on the history panel will be as follow:
- Launcher: It will be launch a default app which match the data's category.
Currently, It's supporting protocols as follow:
Web browsing, email sending, Geo locating(Google map), WiFi connecting, Web searching. - Copy: It's copied on the clipboard all of the selected items. (Timestamp, Data category, Symbology, Label)
- Delete: It's deleted all of the selected items.
- Select items: Multiple items selection mode.
- Save: It's exported all of the selected items as a csv format. (Timestamp, Data category, Symbology, Label)
5. Options
The items will be as follow:
- Image flow direction: The flowing direction of a camera's frame. (Normal, Mirror)
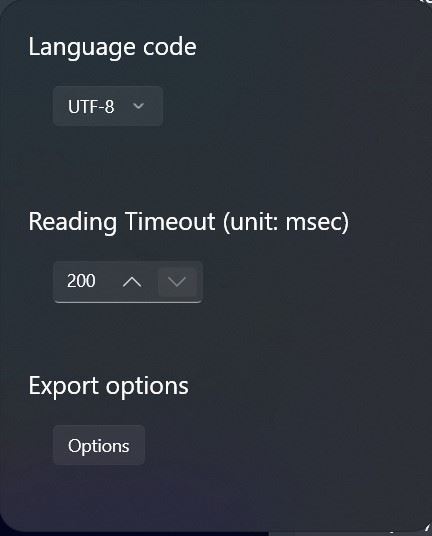
- Language code: For QR code.
It usually selects UTF-8. It will be automatically switched provably, if the scanning data is Shift-JIS. (UTF-8, Shift-JIS) - Tap to foucus: When It's supported by the camera device, can set.
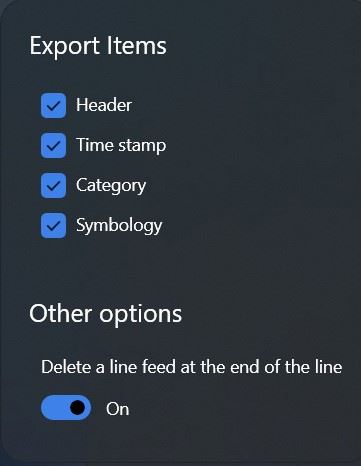
- Export options: Some items to export, user can choice.
Symbologies for Camera
It explains about supported barcode symbologies for camera devices.
The scanning is decoded using software decoder on windows 10 standard SDK(WinRT).
1. Software decode
Supporting symbologies are as follow.
- Code 39
- Code 128
- Databar Omnidirectional
- Databar Stacked
- EAN-8
- EAN-13
- Interleaved 2 of 5
- UPC-A
- UPC-E
- QR code
- GS1-DWCode (Digital Watermark)
2. QR code
This app supports two language codes which UTF-8 and Shift_JIS.
User usually selects UTF-8.
It will be automatically switched provably, if the scanning data is Shift-JIS.
If it's garbled, try to select Shift_JIS. (Shift_JIS is one of the Japanese language codes)
- UTF-8 (default)
- Shift_JIS
Camera Devices
It explains some notes about using camera devices.
1. External web camera
Most of the external web camera are not suitable to scan for barcode.
Because, those devices have some problems as follows:
- Auto-focus is poor.
- Overexpose.
- Distortion around the circumference of the lens.
2. Recommended camera devices
Recommended devices are tablet pc with internal rear camera or 2-in-1 pc. Those devices have a good auto-focus and white-balance controller.
HID Keyboard
It explains how to use about using "HID Keyboard" on usb or bluetooth.
It doesn't need any drivers and easily enter a scanned text in a text area using excel or editor and many other apps too.
Almost of the barcode scanners have it as a default connetcion.
OCR de PawS is not only to easily enetr it, but automatically insert in the history list and possible to launch a default app based on the data category.
1. How to connect
Connect a scanner device and a host device(PC, Tablet...) as follow:
-
USB: First, the barcode scanner need to set on "USB HID Keyboard", and connect with a host device after that.
For connecting, use a usb cable or dongle. - Bluetooth: First, the barcode scanner need to set on "Bluetooth HID Keyboard", and pairing with a host device after that.
The barcode scanner and a host device, Those keyboard settings need to sync each other as a same country keyboard.
For example: When the host device is with the USA keyboard, needs to set on the USA keyboard the scanner too.
If both devices dont't sync, some characters will be garbled.
For example:
Scanner's setting: USA keyboard.
Host device: Japanese keyboard.
Scanned result: https://...
Received text: https+//...
2. A scanning procedure
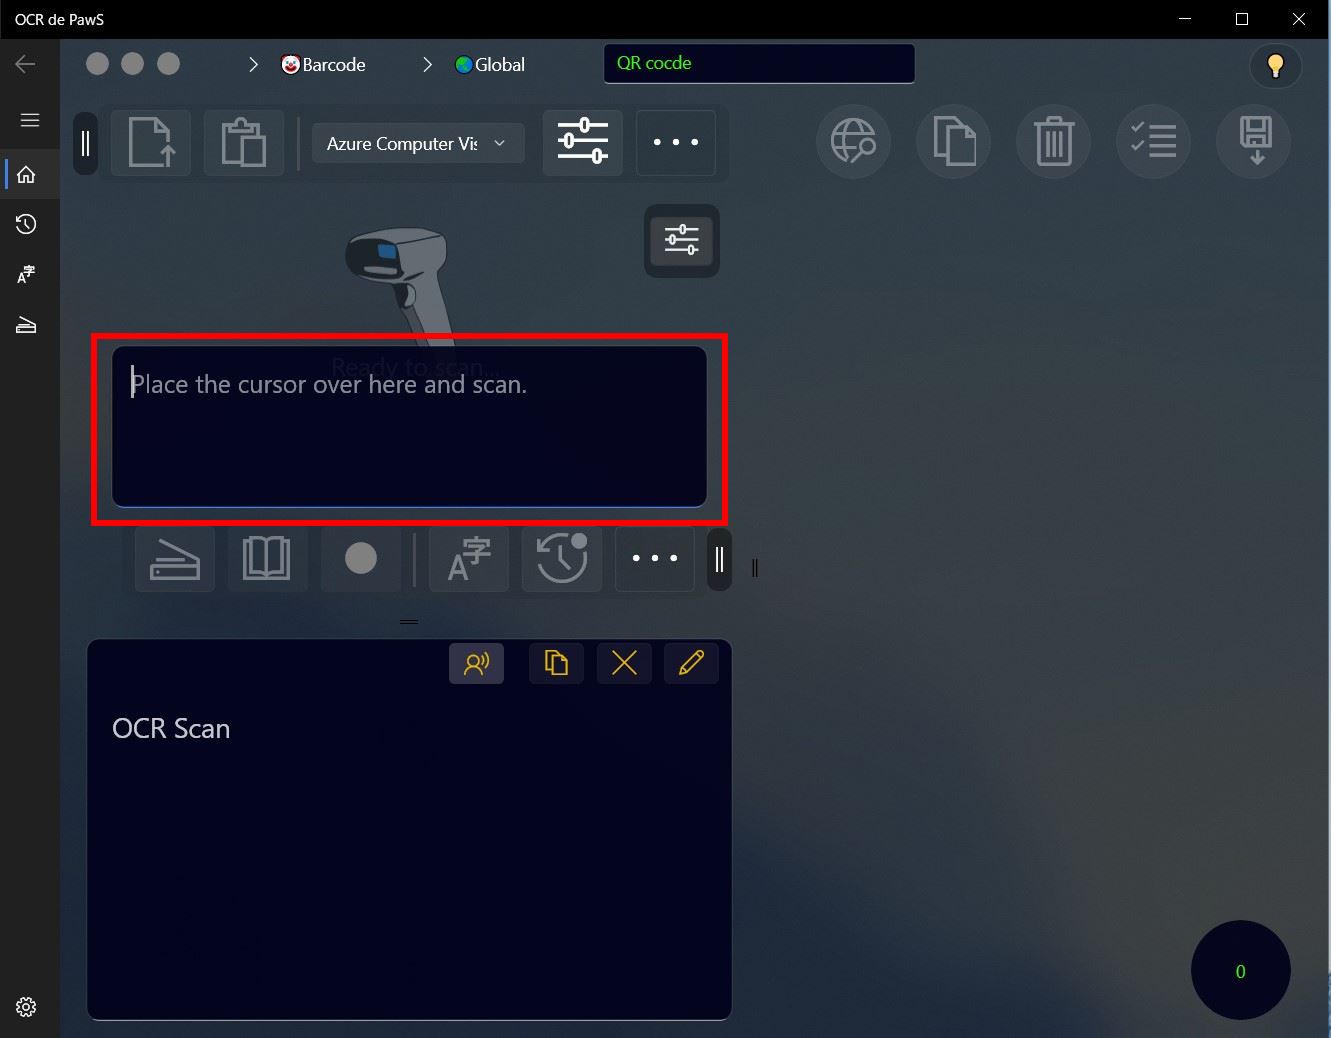
① Select "HID Keyboard" from in the scanners list, and click on "Barcode" button after that.
② Place the cursor over the text box which input scanned text.
③ A scanned text will be entered when scan by barcode scanner,
and add in the history list and the text box will be automatically cleared after that.
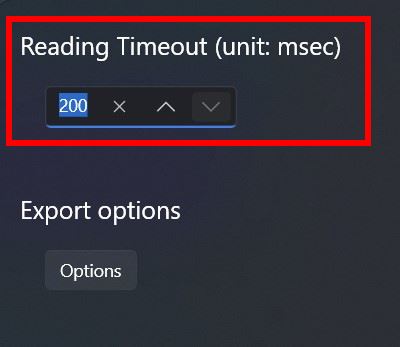
3. Reading timeout
From scanning a barcode until inserting the text in the history list,
its processing will be accelerated when set a smaller value.
Default value: 1000msec
Serial Connection
It explains how to use about using "Serial Connection" on usb or bluetooth.
A scanner device can connect with a host device as a serial communication by setting on "USB Vertual COM" or "Bluetooth SPP".
1. How to connect
Connect a scanner device and a host device(PC, Tablet...) as follow:
-
USB: First, the barcode scanner need to set on "USB Virtual COM", and connect with a host device after that.
For connecting, use a usb cable or dongle. - Bluetooth: First, the barcode scanner need to set on "Bluetooth SPP", and pairing with a host device after that.
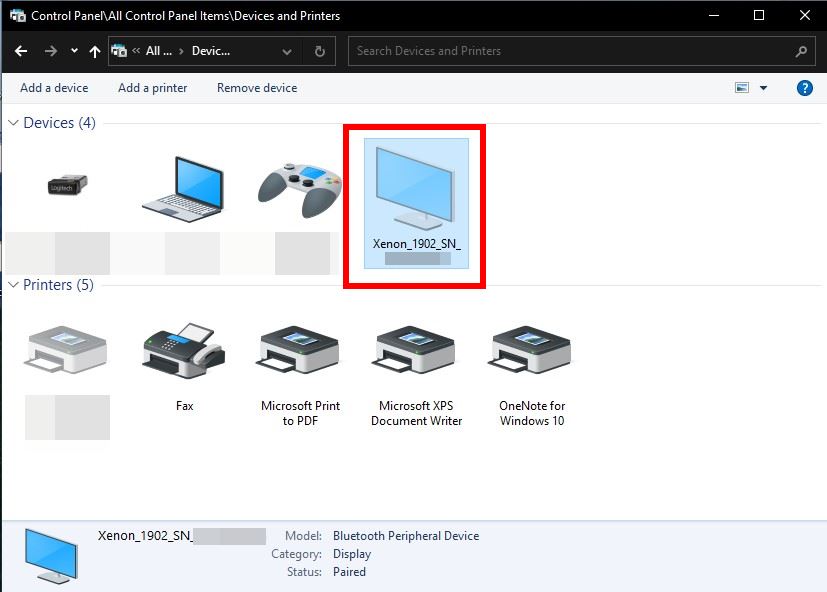
User can find a com port in the following ways when succeeded to connect.
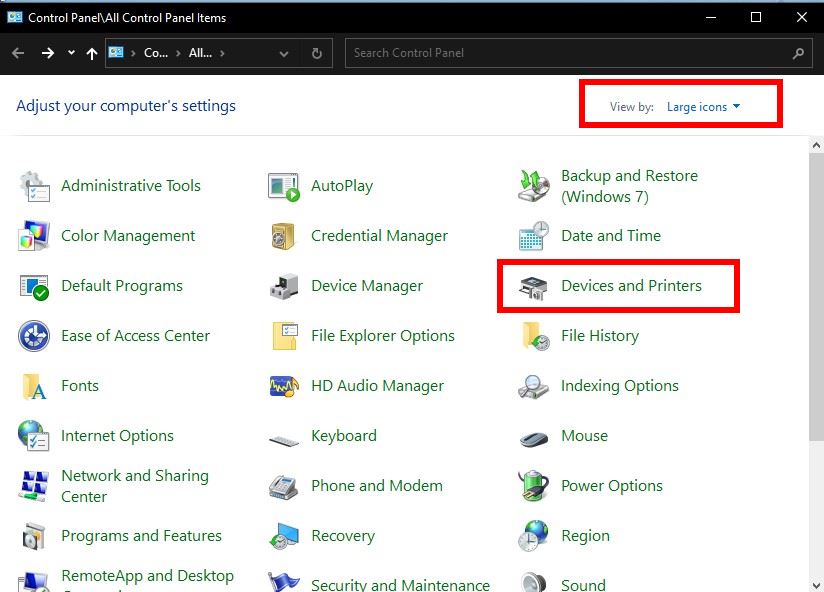
"Control Panel" >「Devices and Printers」
The example image below was viewed by Large icons.
The category was recognized as a Display by os, but don't care and ignore.
The example image below is that "Honeywell Xenon HD1902-SR" connected with a pc by using "Bluetooth SPP".
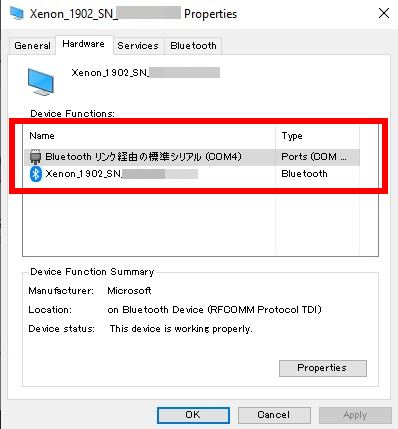
Select the device and show the properties by right click after that.
COM name on the "Hardware" tab is the "Bluetooth SPP" port when connected.
The example image below was assigned "COM4".
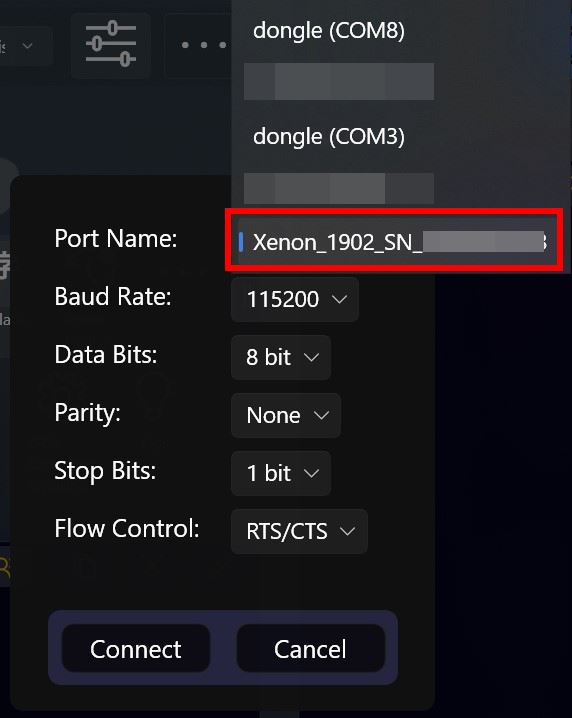
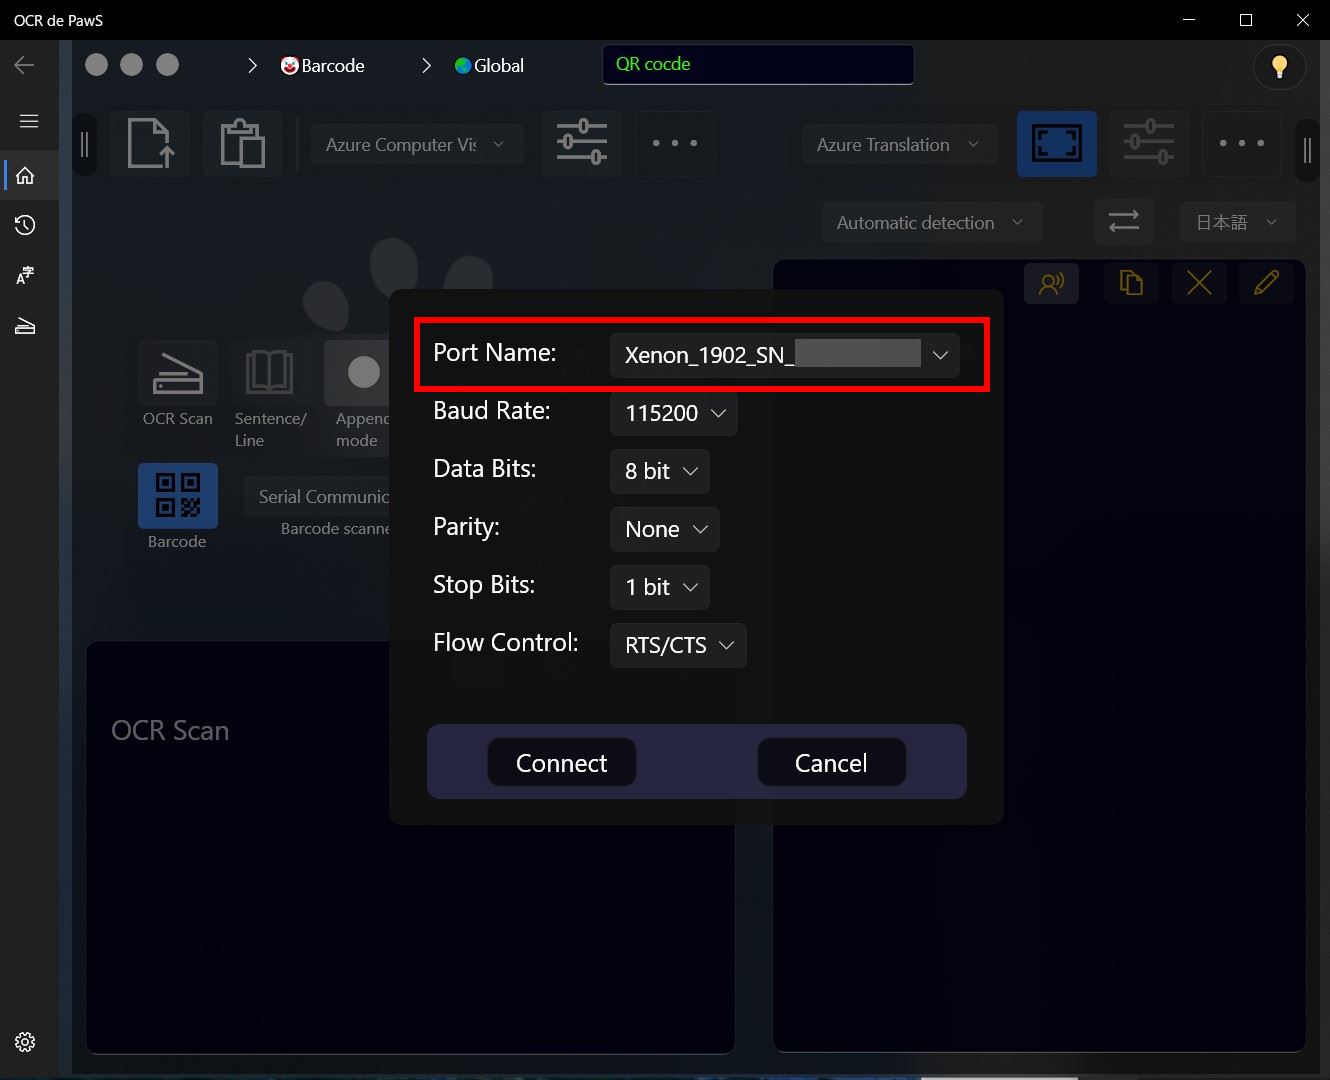
A connected serial port name is appeared in the port name list on this app as follow:
"Scanner device name" or "Scanner device name(COM)".
2. A scanning procedure
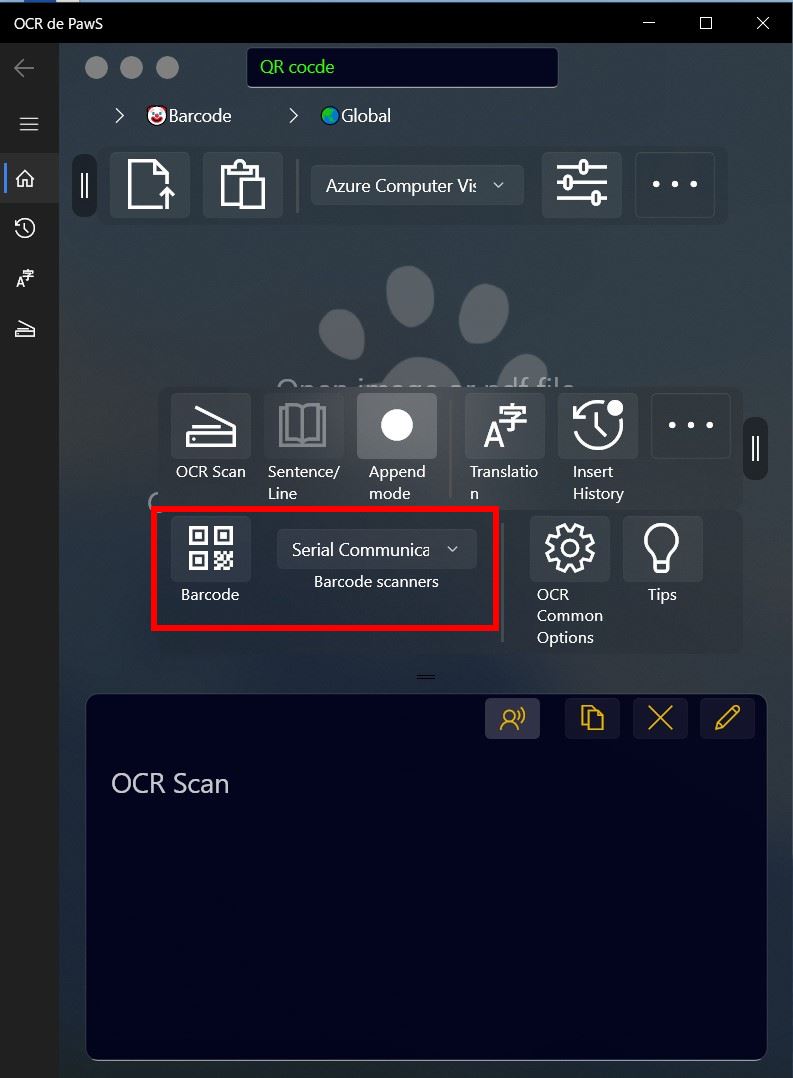
① Select "Serial Communication" from in the scanners list, and click on "Barcode" button after that.
② Select a port name to connect by serial connection panel.
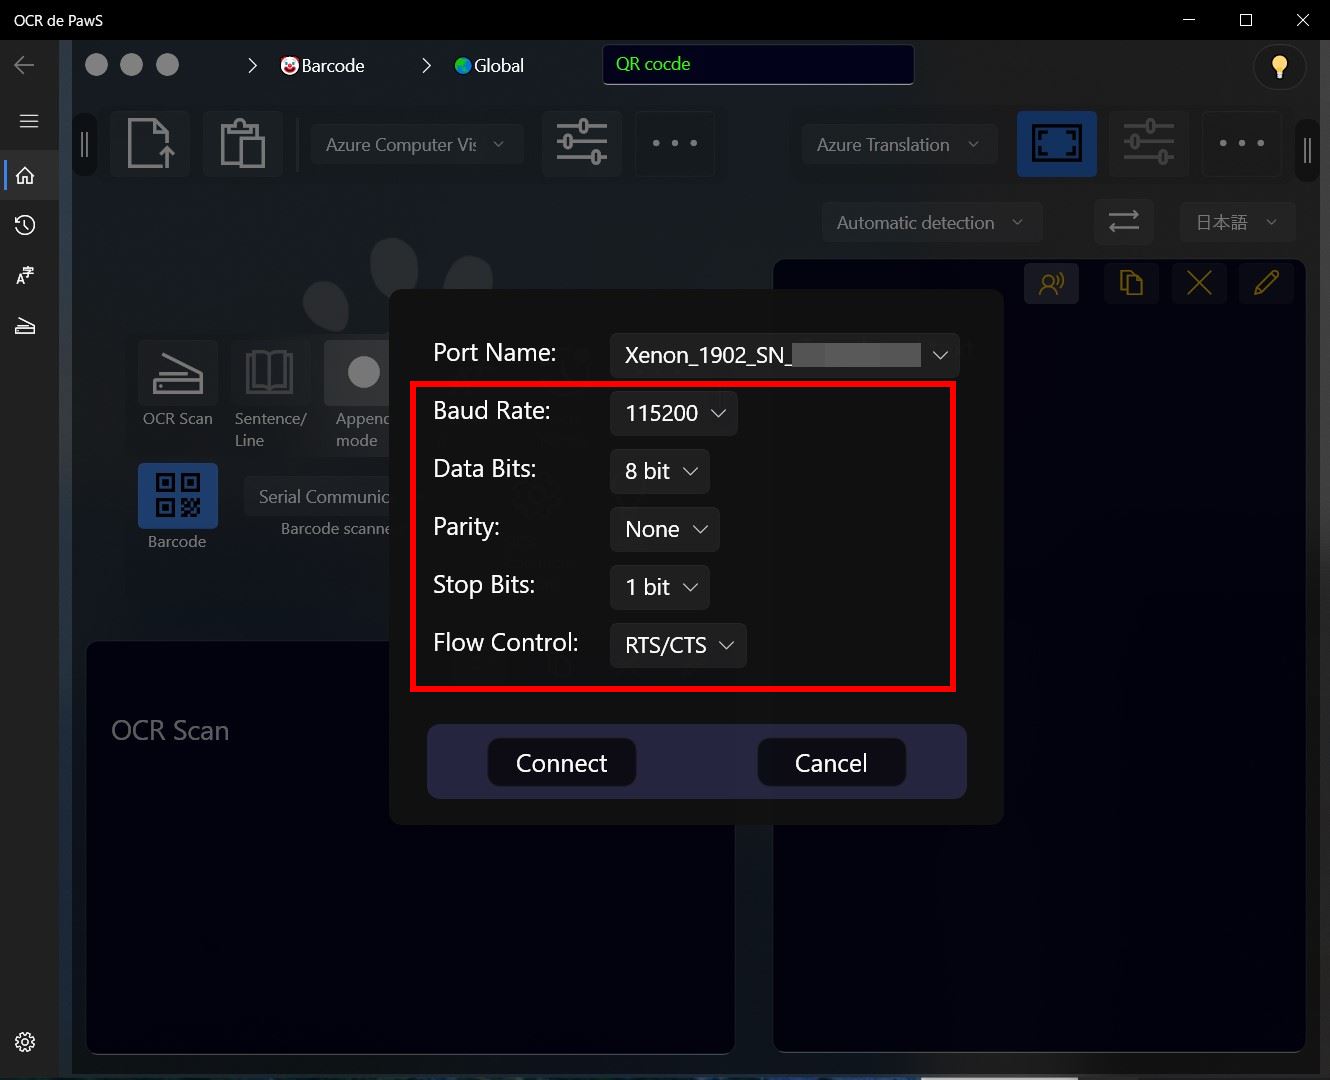
③ Baud Rate and other options need to set same values the host device.
If user doesn't know those values, try to use default values.
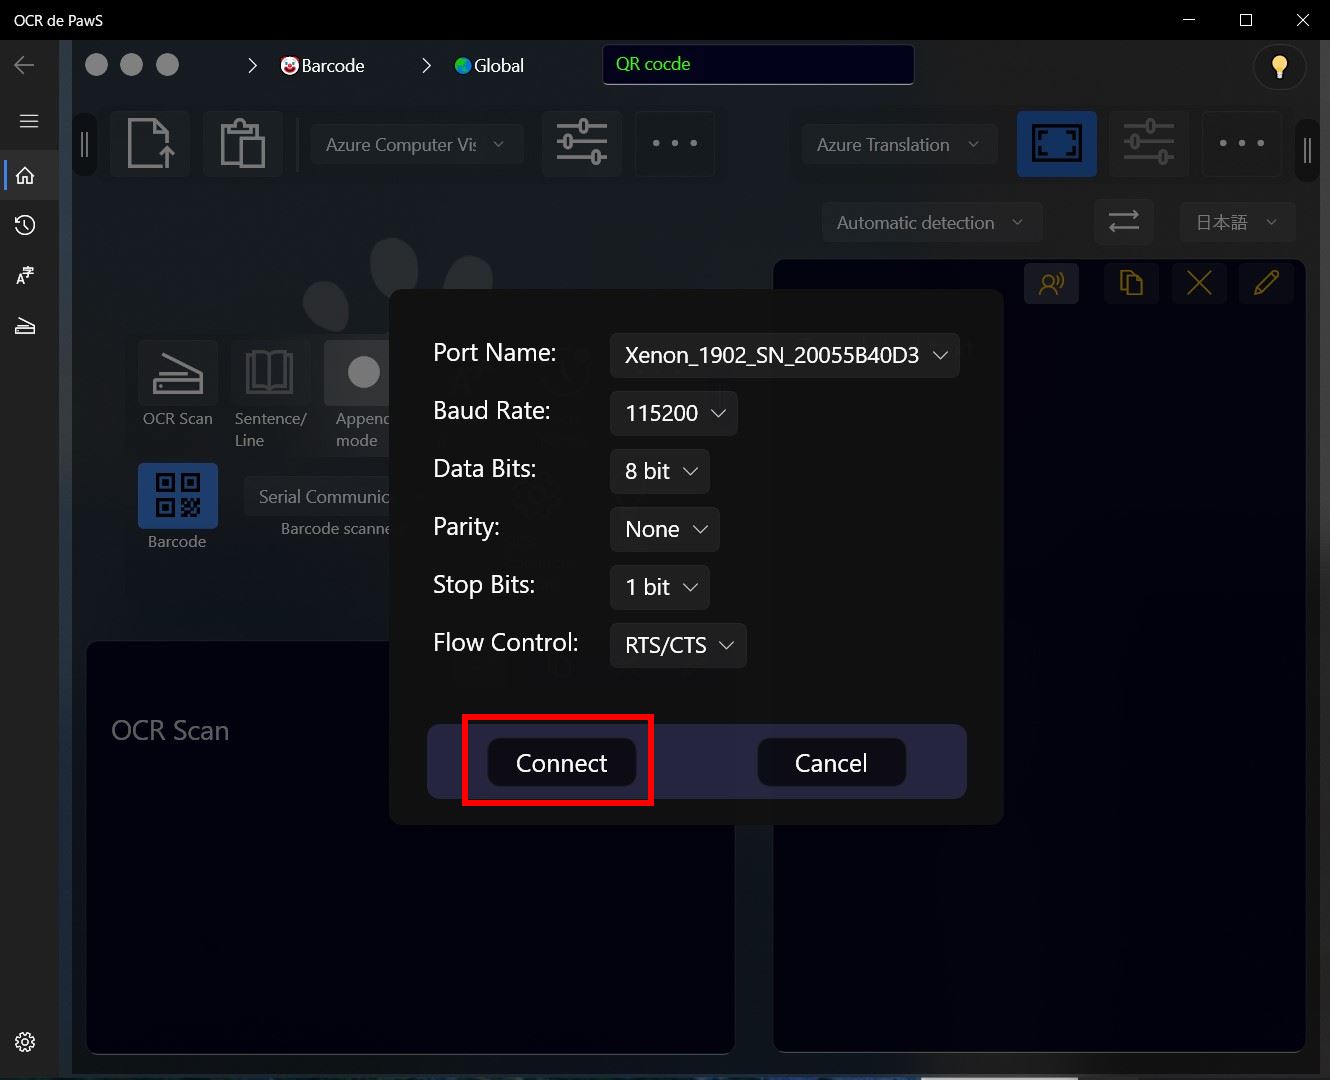
④ Check the scanner power is active, and click on the "Connect" button after that.
⑤ A scanned text will be inserted in the history list when scan by barcode scanner.
3. Reading timeout
From scanning a barcode until inserting the text in the history list,
its processing will be accelerated when set a smaller value.
Default value: 1000msec
4. Disconnect by sleep
This app has been programmed for releasing unnecessary resources as an eco system.
Therefore, Serial communication will be disconnected by this app when the scanner device is in sleep.
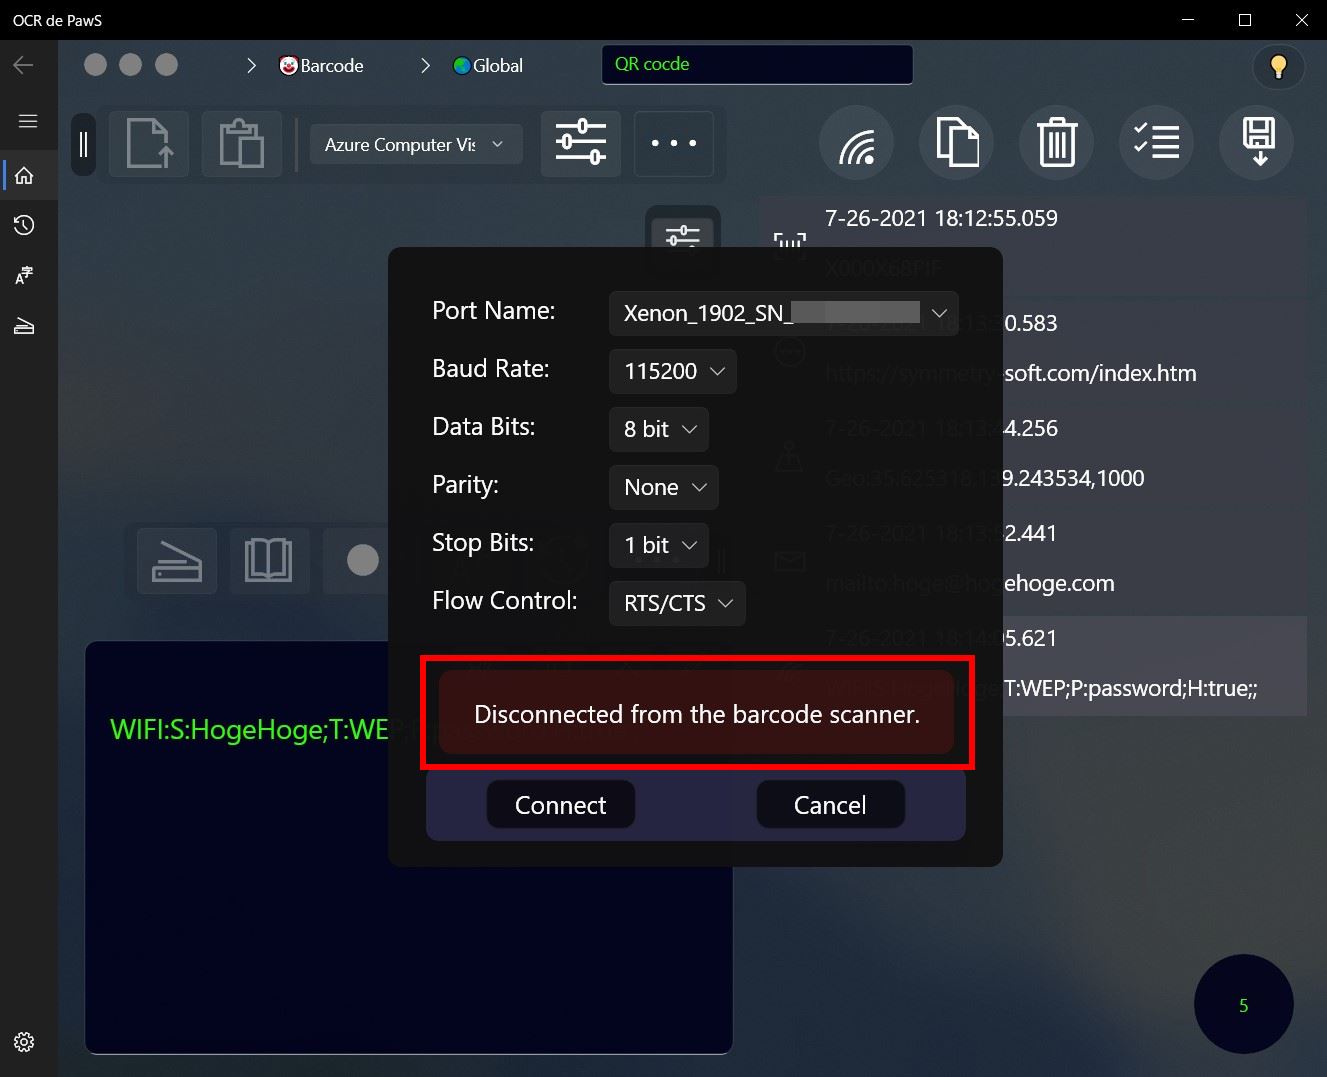
It's shown the serial connection panel again after that, and notify a disconecting message.
When user want to scan again, active the scanner power and connect again.
HID-POS
It explains how to use about using "HID-POS" on usb.
1. How to connect
Connect a scanner device and a host device(PC, Tablet...) as follow:
- USB: First, the barcode scanner need to set on "USB HID-POS", and connect with a host device after that. For connecting, use a usb cable or dongle.
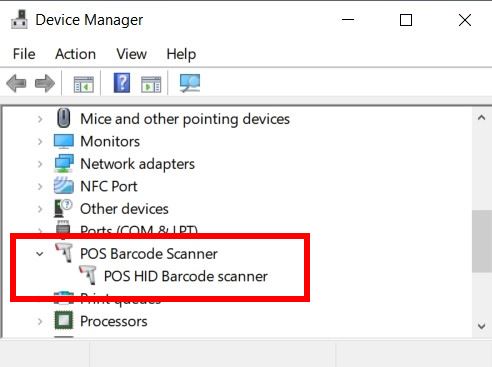
It appears in Device Manager when succeed to connect same as a follow:
"POS Barcode Scanner" > "POS HID Barcode Scanner".
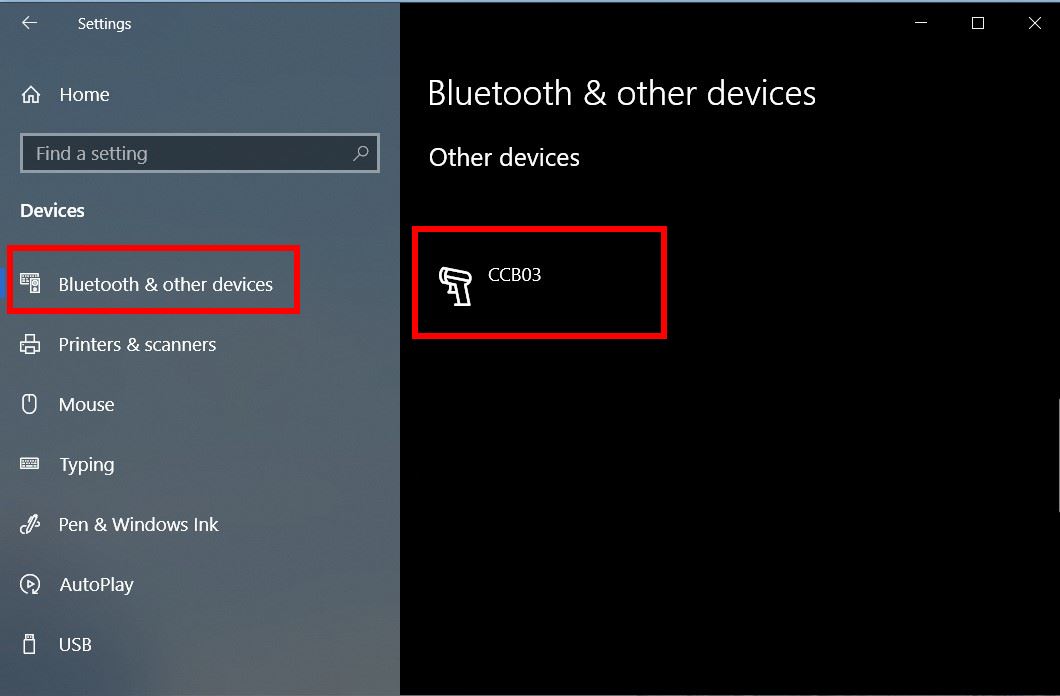
User can check about the scanners name where windows 10 settings app.
"Devices" > "Bluetooth & other devices" > "Other devices"
The name in the example image below is a name of "Honeywell Xenon HD1902h-HD".
2. A scanning procedure
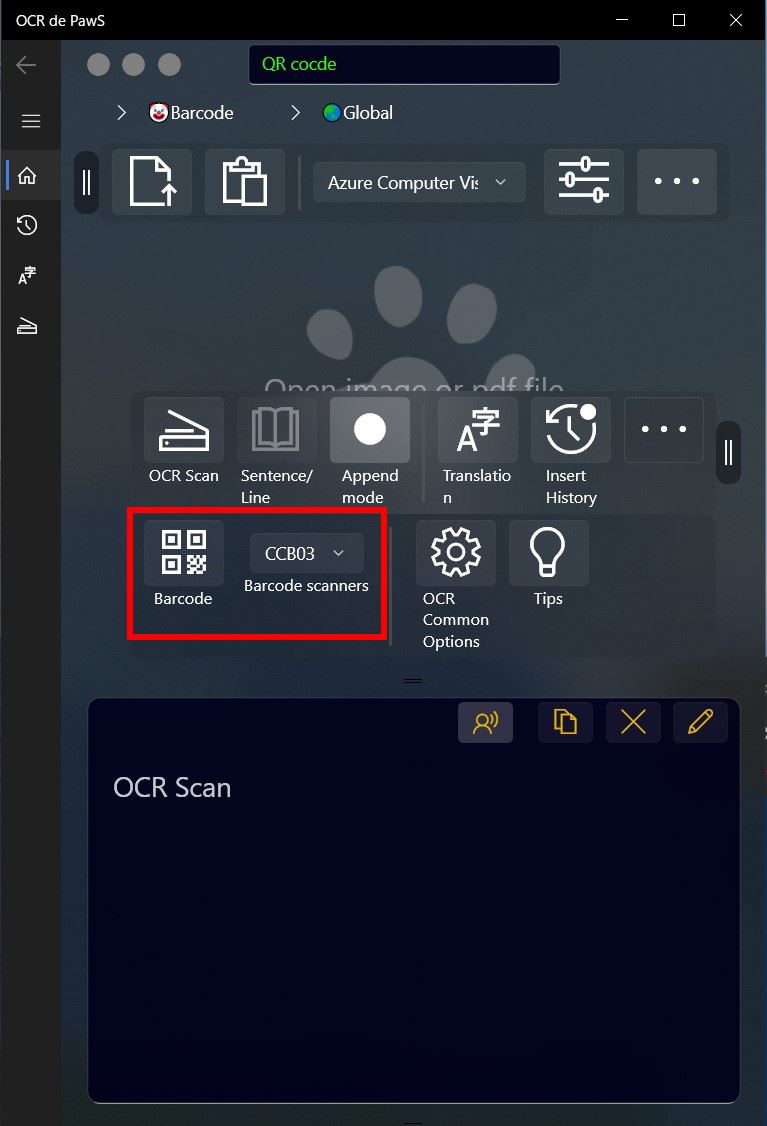
① Select a "Device name" from in the scanners list, and click on "Barcode" button after that.
② A scanned text will be inserted in the history list when scan by barcode scanner.
Devices list supporting HID-POS and SPP-SSI
HID-POS and SPP-SSI are supported is the following the devices, and those have been checked by Microsoft on June in 2018.
Bluetooth SPP-SSI(Serial Port Protocol - Simple Serial Interface), It's called "SPP-SSI" by Microsoft, but it may be called as a different name on other manufactures.
SPP-SSI isn't tested in this app, but if user has a supported scanner device, probably, it will be appeared in this app's scanners list same as a HID-POS device.
If it's not appeared in the list, it's general SPP(Serial Port Profile).
Devices list
(*1)Upgradable to support 2D barcodes through Honeywell
(*2)Upgradable using Zebra 123Scan
Generate QRcode
This app doesn't support a generating feature of the QR code.
It explains about how to generate safely a QR code in this section.
Many native apps for generating QR code on pc have some issues.
For example, It garbled when set shift-jis, or not supports WiFi connection for stealth mode.
Web app, it isn't a safe for your privacy due to a sending to server.
In such a case, try the following ways.
1. Generate a tentative QR code using a fake data
Enter a fake data on the website and generate a QR code.
We recommend the Zxing project website.
The Zxing is one of the open source library for a barcode encoding and decoding.
This library has been used in "OCR de PawS" for scanning a barcode in an image file or on clipboard.
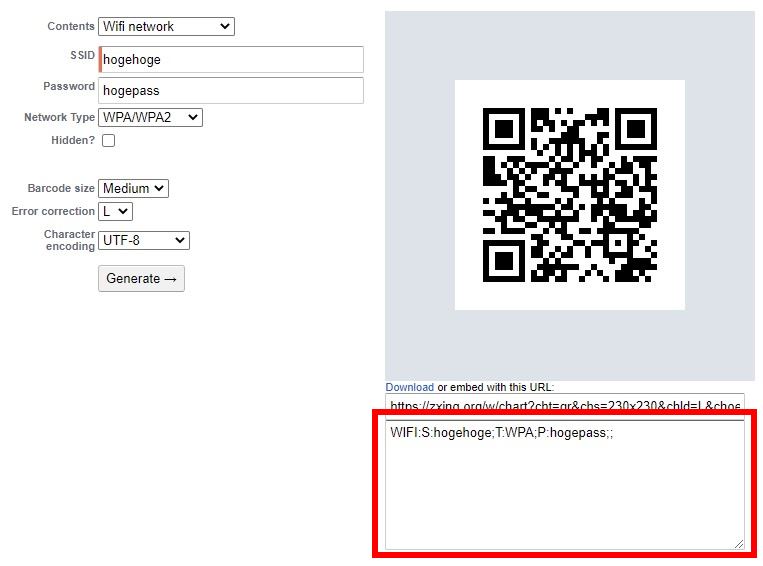
For example: It generates a tentative QR code using a fake data.
First, select the Wifi network, and enter some fake values. Click on the generate button after that.
If you want to set on a stealth mode with your ssid, check on the hidden option.
After generate, copy a text data inside the red frame.
2. Regenerate the QR code using your real data by your native app
Search the Microsoft Store for an app that will generate a QR code from text data. Its app is enough just a simple feature which can generate a QR code from a text data.
Paste a copied data, and replace SSID and password to real data after that.
Lastly, it will complete when generate a QR code.
